Satis, is a lightweight and easy to install Composer Repository. Out the box Satis doesn’t provide any mechanism to automate the build process or maintaining the repositories.
There’re few solutions out there that allows you to modify your satis.json file using a web interface. The best solution right the second is Satisfy, it’s pretty handy but the lack of documentation and configuration makes you spend a lot of time trying to make it work.
In this tutorial we’re going to automate our Satis build and CRUD operations using the Web Interface of a Git repository provider like Bitbucket or GitHub..
Requirements:
- A Satis Server follow this tutorial
- Git
The idea is to use Bitbucket, GitHub or any other Git provider to store our satis.json and maintain it using their Web Editor Interface. That way you have an interface to add, remove and modify your satis.json file without having to log in into the Satis server.
For this tutorial I’m going to be using Bitbucket but you can use any other provider.
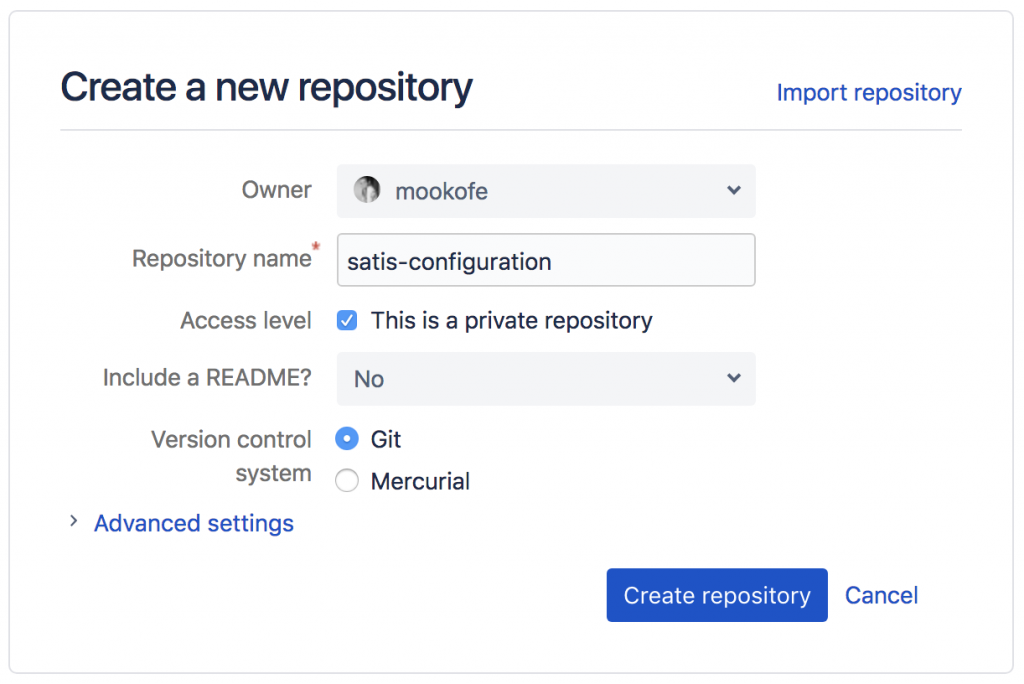
Step 1. Create Git repository
Open your Git provider and create a repository called “satis-configuration”:
Step 2. Add satis.json and other files
The next step is add the satis.json file to the root of your repository with the following content:
|
1 2 3 4 5 6 7 8 9 10 11 12 13 14 15 |
{ "name": "My Repository", "homepage": "https://packagist.yourdomain.com", "repositories": [ { "type": "vcs", "url": "git@github.com:mookofe/php-benchmark.git" } ], "require-all": true, "require-dependencies": false, "require-dev-dependencies": false, "archive": { "directory": "dist", "format": "tar", "skip-dev": true } } |
Add the file build-satis.sh to the root the repository with the following content:
|
1 2 3 4 5 6 7 8 9 |
#!/bin/bash echo "Fetching Satis configuration changes..." cd /opt/satis/satis-configuration git pull echo "Building SATIS configuration..." cd /var/www/html php satis/bin/satis build /opt/satis/satis-configuration/satis.json . |
Step 3. Clone repository in Satis server
In your Satis server, create the satis folder to clone your configuration repository as follows:
|
1 2 3 |
mkdir /opt/satis cd /opt/satis git clone git@bitbucket.org:<username>/satis-configuration.git |
Note: Make sure your Satis server keys are added to your private git repository.
Step 4. Add build command to crontab
Add the following code to your crontab file to execute the build every 2 mins, feel free to change it base on your needs:
|
1 2 |
#Update SATIS repositories index (Executed every 2 minutes) */2 * * * * sh /opt/satis/satis-configuration/build-satis.sh |
You’re good to go! All you have to do is add your new packages to your satis.json file in the Git repository with in Bitbucket and automatically the index will be created every 2 minutes.
Another solutions:
As I mentioned before, there’re few other solutions that allow you to do this using a Web Interface. These are the most popular at the moment:
